
How to Verify Hi Vis Compliance Standards: 2026 Guide


Table of Contents
- Why Verifying Hi Vis Compliance Standards Matters
- Step 1: Check AS/NZS 4602.1 Compliance on the Garment Label
- Step 2: Understand Hi Vis Clothing Labelling Requirements
- Step 3: Inspect Retro-Reflective Tape and Photometric Performance
- Step 4: Conduct a Visual Inspection for Wear and Damage
- Step 5: Know When to Replace Hi Vis Workwear
- Step 6: Build a Workplace Compliance Checklist
- Conclusion: Making Hi Vis Compliance Verification Routine
- Frequently Asked Questions
Last Updated: October 2, 2026
Why Verifying Hi Vis Compliance Standards Matters
Hi vis compliance is the practice of confirming that high-visibility workwear meets the relevant safety standard before your team wears it on site. This guide from Hi Vis Work Clothes shows you how to verify hi vis compliance standards step by step, from reading the garment label to building a workplace checklist.
Getting this wrong puts people at risk. A vest that looks bright but fails the standard gives workers false confidence in low light. It also leaves your business exposed during a safety audit.
The good news: verification takes minutes once you know what to look for. Below, we break the process into six steps any safety manager can follow.
Step 1: Check AS/NZS 4602.1 Compliance on the Garment Label
AS/NZS 4602.1 compliance starts with the label. This is the joint Australian and New Zealand standard for high-visibility safety garments, and it sets out how garments must perform.
Every compliant garment carries a label stating the standard number. If that label is missing, faded, or vague, stop there. The garment cannot be verified.
The standard is maintained by Standards Australia, and it works alongside AS/NZS 1906.4, which covers the retro-reflective and fluorescent materials used on the garment.
What the Day/Night Classification Codes Mean
The classification code tells you when the garment is suitable for use.
- Day (D): Fluorescent background material only. Suitable for daytime visibility.
- Night (N): Retro-reflective tape only. Suitable for night use where vehicle headlights hit the tape.
- Day/Night (DN): Both fluorescent background and retro-reflective tape. The most versatile class.
Most construction and logistics teams should standardise on DN garments. They cover both daytime visibility and nighttime conspicuity in one item.
Reading the Manufacturer and Certification Details
Check three things on the label: the manufacturer name, the standard number, and the classification code. A compliant label is specific. A non-compliant one is generic.
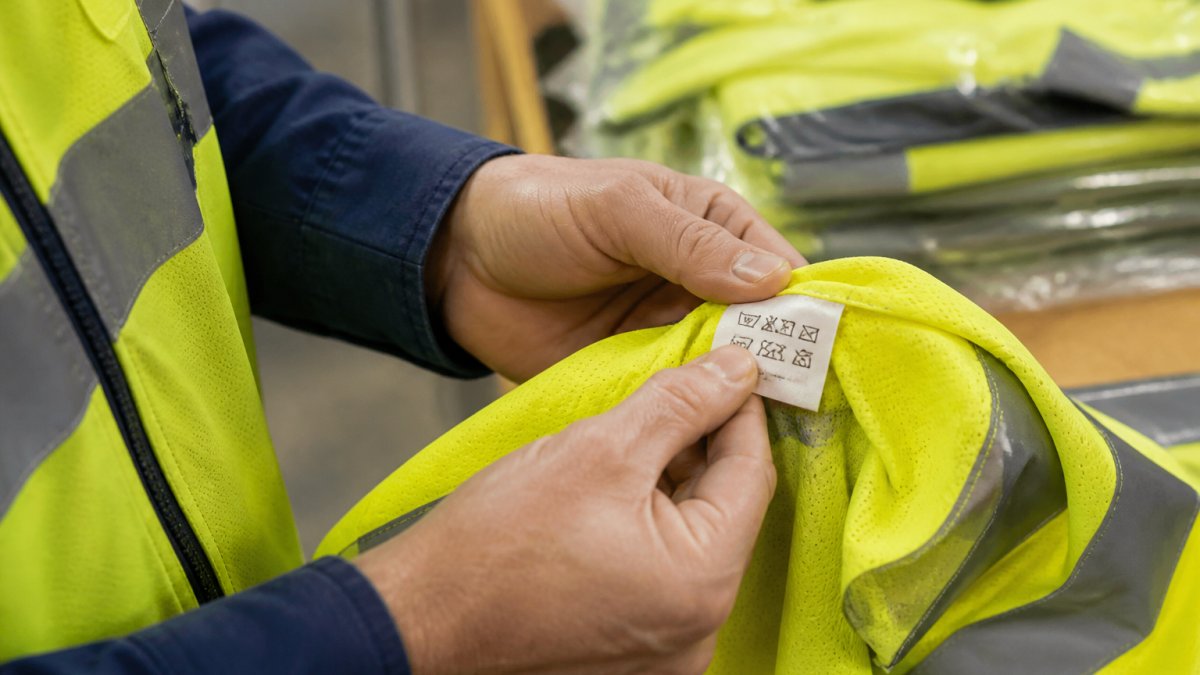
Step 2: Understand Hi Vis Clothing Labelling Requirements
Hi vis clothing labelling requirements exist so anyone can check a garment without specialist equipment. The label is your proof of compliance, and auditors will ask to see it.
Mandatory Information on Every Garment Label
A compliant label should show:
- The standard number (AS/NZS 4602.1)
- The classification code (D, N, or DN)
- The manufacturer or supplier name
- The material standard reference (AS/NZS 1906.4)
- Size and care instructions
If any of these are absent, the garment fails verification.
Spotting Counterfeit or Non-Compliant Labels
Counterfeit garments are a real problem in the workwear market. They copy the look of compliant gear at a lower price, then fail in the field.
Watch for these red flags:
- No standard number printed anywhere
- Spelling errors in the standard name
- A classification code that does not match the garment (a "DN" vest with no reflective tape)
- Labels that peel off or fade after one wash
Step 3: Inspect Retro-Reflective Tape and Photometric Performance
Photometric performance is how well the tape reflects light back to its source. This is what makes a worker visible at night, and it is the hardest part of a garment to check by eye.
You cannot measure photometric performance to laboratory precision without a testing lab. What you can do is run a structured field assessment that identifies tape that has already failed or is close to failing.
What AS/NZS 1906.4 Actually Requires
AS/NZS 1906.4 sets the material performance requirements for retro-reflective tape and fluorescent background fabric. For retro-reflective tape, the key measure is coefficient of retroreflection (RA), expressed in candelas per lux per square metre (cd/lx/m²).
For fluorescent background material, the standard defines chromaticity coordinates and minimum luminance factors. This is why a faded vest that still looks "yellowish" can fail: the colour has drifted outside the permitted chromaticity range, and the luminance factor has dropped below the minimum.
A Practical Field Test for Retro-Reflective Tape
You do not need a retroreflectometer to identify failing tape. Use this method:
- Torch test in a dark room. Hold a bright torch at eye level, about 5 metres from the garment. Compliant tape returns a sharp, bright reflection directly back at you. Worn tape returns a dull, diffuse glow or no visible return.
- Angle test. Move the torch slightly off-axis. Retro-reflective tape is designed to return light to the source across a range of angles. If the reflection disappears as soon as you move the torch even slightly, the tape's retro-reflective structure has degraded.
- Wet test. Dampen the tape with a spray bottle. Some failing tape performs acceptably when dry but loses retro-reflectivity when wet. If the reflection drops noticeably when wet, treat the garment as suspect.
- Contrast check. Compare the suspect garment against a known-new compliant garment of the same type under the same torch. A side-by-side comparison makes subtle degradation obvious.
Physical Indicators of Tape Failure
Run your hand along the retro-reflective tape and look for:
- Cracking, peeling, or lifting edges
- Dull or grey patches where the retro-reflective layer has worn away
- Tape that has shrunk or separated from the fabric
- Fluorescent background material that has faded toward white
- Tape that feels stiff or brittle rather than flexible
When to Escalate to Laboratory Testing
Field testing is a screening tool, not a replacement for laboratory verification. Escalate to a accredited testing laboratory when:
- You are evaluating a new supplier or a new garment specification
- A field test result is borderline and you need a definitive answer
- You are investigating a workplace incident where visibility may have been a factor
- Your compliance management system requires periodic verification testing
Accredited laboratories in Australia test to AS/NZS 1906.4 methods and can provide a test report that stands up to audit scrutiny. Your supplier should be able to provide existing test reports for the specific garment model you are purchasing.
Step 4: Conduct a Visual Inspection for Wear and Damage
A visual inspection catches most compliance failures before they reach an auditor. Build it into your routine, not your annual review.
Check each garment for:
- Faded fluorescent background material
- Torn, cracked, or missing reflective tape
- Broken zips, missing press studs, or torn seams
- Heavy soiling that blocks light reflection
- Logo printing or embroidery that covers reflective striping
That last point matters more than people think. Custom branding that runs across the reflective tape reduces visibility and can void compliance. When you order branded workwear, keep logos clear of the tape.
A garment can look bright in daylight and still fail at night. Always check retro-reflective tape separately from the fluorescent background, because they fail for different reasons.
Step 5: Know When to Replace Hi Vis Workwear
When to replace hi vis workwear comes down to one test: can the garment still do its job? If visibility is compromised, it is finished, regardless of how it looks on the hanger.
Replace a garment when:
- The fluorescent colour has faded noticeably
- Reflective tape is cracked, peeling, or dull
- The fabric is torn or the tape has lifted
- The label is no longer readable
- The garment has been through heavy contamination
There is no fixed replacement schedule that fits every workplace. A ground crew working outdoors in harsh sun will wear out garments faster than an indoor warehouse team.
How Laundering Degrades Retro-Reflectivity
Laundering is the most underestimated cause of hi vis failure. Every wash cycle subjects the garment to mechanical agitation, heat, and chemicals that break down the retro-reflective tape and fluorescent dye.
The mechanisms are specific:
- Mechanical abrasion. The tumbling action of a washing machine wears away the microscopic glass beads or prismatic structures that give retro-reflective tape its reflectivity. This is cumulative and irreversible.
- Chemical attack. Harsh detergents, bleach, and fabric softeners degrade the binder that holds the retro-reflective elements in place. Fabric softener is particularly damaging because it leaves a residue that blocks light reflection.
- Heat damage. High-temperature washing and drying can cause the tape to shrink, crack, or delaminate from the fabric. It also accelerates fading of the fluorescent background.
- Detergent residue. Powder detergents that do not dissolve fully can leave a film on the tape that reduces retro-reflectivity even when the tape itself is intact.
AS/NZS 1906.4 includes requirements for care labelling and, in some cases, performance after a specified number of wash cycles. Check the garment's care label and the manufacturer's stated wash-cycle limit.
Building a Condition-Based Replacement Schedule
Instead of a fixed calendar, build a replacement schedule around actual wear and wash cycles:
| Factor | Low-Risk Environment | High-Risk Environment |
|---|---|---|
| Sun exposure | Indoor or shaded | Full outdoor sun daily |
| Wash frequency | Weekly or less | Daily or every second day |
| Contamination risk | Low (office, warehouse) | High (oil, chemicals, dirt) |
| Inspection frequency | Monthly | Weekly |
| Expected service life | 12-18 months | 3-6 months |
These ranges are indicative only. The key principle is that wash cycles and sun exposure are the two biggest drivers of degradation. A garment washed daily in a high-sun environment may fail in three months, while the same garment worn indoors and washed weekly may last well over a year.
Laundering Practices That Preserve Compliance
Follow these practices to maximise the compliant life of every garment:
- Wash according to the care label, never above the stated temperature
- Use a mild detergent and avoid bleach and fabric softener entirely
- Do not overload the washing machine; agitation damage increases with crowding
- Air dry where possible; if tumble drying, use low heat
- Never iron directly over retro-reflective tape
- Wash hi vis garments separately from heavily soiled workwear to reduce abrasion
A garment that has exceeded the manufacturer's stated wash-cycle limit is no longer verifiably compliant, even if the tape still reflects light in a torch test. Record wash cycles or laundering dates as part of your compliance records.
Step 6: Build a Workplace Compliance Checklist
A workplace compliance checklist turns verification into a routine. Use this one as a starting point and adapt it to your site.
| Check | Frequency | Who Does It |
|---|---|---|
| Verify garment labels on delivery | Every batch | Stores or procurement |
| Visual inspection of each garment | Monthly | Safety officer |
| Reflectivity test with torch | Quarterly | Safety officer |
| Full garment replacement review | Annually | Safety manager |
| Supplier compliance records audit | Annually | Procurement |
Work through the list in order:
- Confirm the standard number and classification code on every new garment.
- Record supplier details and keep label photos on file.
- Inspect garments monthly for wear, fading, and tape damage.
- Remove any garment that fails inspection from service immediately.
- Review your supplier's compliance documentation each year.
For the underlying legal duties around protective equipment, check Safe Work Australia's guidance on PPE. It sets out what employers must provide and maintain.
If you would rather not manage verification alone, Standards Australia publishes the full standard text, and reputable suppliers will provide compliance documentation on request.
Conclusion: Making Hi Vis Compliance Verification Routine
Verifying hi vis compliance does not need to be complicated, but it does need to be consistent. A label check on delivery, a monthly visual inspection, and a clear replacement rule will catch almost every problem before an auditor does.
Hi Vis Work Clothes supplies high-visibility workwear built for teams that need to stay compliant and comfortable.
Get a Quote and give your team gear you can verify, wear after wear.
Frequently Asked Questions
How do I know if my hi vis clothing is compliant?
Check the garment label for AS/NZS 4602.1 certification and the day/night classification code (D, N, or DN). Verify the manufacturer name, standard number, and care instructions are present. Inspect the retro-reflective tape for cracking, peeling, or fading. If the label is missing, illegible, or the tape shows damage, the garment no longer meets hi vis compliance standards and should be replaced.
Does hi vis clothing expire or lose its compliance?
Hi vis clothing does not have a fixed expiry date, but it loses compliance when the fluorescent background fades or the retro-reflective tape degrades. Washing, UV exposure, and physical wear all reduce photometric performance. Replace garments when the fluorescent colour dulls, tape cracks or peels. Regular visual inspection is the only reliable way to confirm ongoing compliance.
What information must be on a hi vis garment label?
Hi vis clothing labelling requirements in Australia mandate the manufacturer or supplier name, the AS/NZS 4602.1 standard number, the day/night classification (D, N, or DN), and care instructions. Some labels also include the fabric composition and wash cycle limits. If any of these details are missing or unclear, the garment cannot be verified as compliant and should not be used in hazardous workplace environments.
Who is responsible for ensuring hi vis compliance on site?
Under Australian work health and safety laws, the person conducting a business or undertaking (PCBU) is responsible for ensuring hi vis compliance. This includes providing compliant garments, training workers to inspect them, and replacing worn items. Safety officers and team leads typically handle day-to-day verification, but the legal duty sits with the PCBU. Keep records of garment inspections and replacements for compliance audits.
Recent Blogs
October 03, 2026
How to Verify Hi Vis Compliance Standards: 2026 Guide
Learn how to verify hi vis compliance standards in Australia....
October 03, 2026
How to Verify Hi Vis Compliance Standards: 2026 Guide
Learn how to verify hi vis compliance standards in Australia....
October 03, 2026
How to Verify Hi Vis Compliance Standards: 2026 Guide
Learn how to verify hi vis compliance standards in Australia....