
Durable Reflective Tape for Work Shirts: 2026 Guide


Table of Contents
- Why Reflective Tape Quality Decides Whether Your Work Shirts Stay Compliant
- How to Choose Durable Reflective Tape for Work Shirts
- AS/NZS 4602.1 High Visibility Safety Garments: What the Standard Actually Requires
- Sew-On vs Iron-On Reflective Tape Durability Compared
- How to Clean High Vis Shirts With Reflective Tape Without Ruining It
- Troubleshooting: Why Reflective Tape Peels, Fades and Fails
- Conclusion
- Frequently Asked Questions
Last Updated: September 29, 2026
Why Reflective Tape Quality Decides Whether Your Work Shirts Stay Compliant
Reflective tape is the part of a work shirt that fails first, and it fails quietly. A shirt can look intact after a year of washes while the tape has cracked, greyed or lifted at the edges, and no longer does the one job it was bought for.
How to Choose Durable Reflective Tape for Work Shirts
Choosing durable tape comes down to four variables: the reflective technology, the tape width, the garment class it must satisfy, and the specific hazards of the workplace.
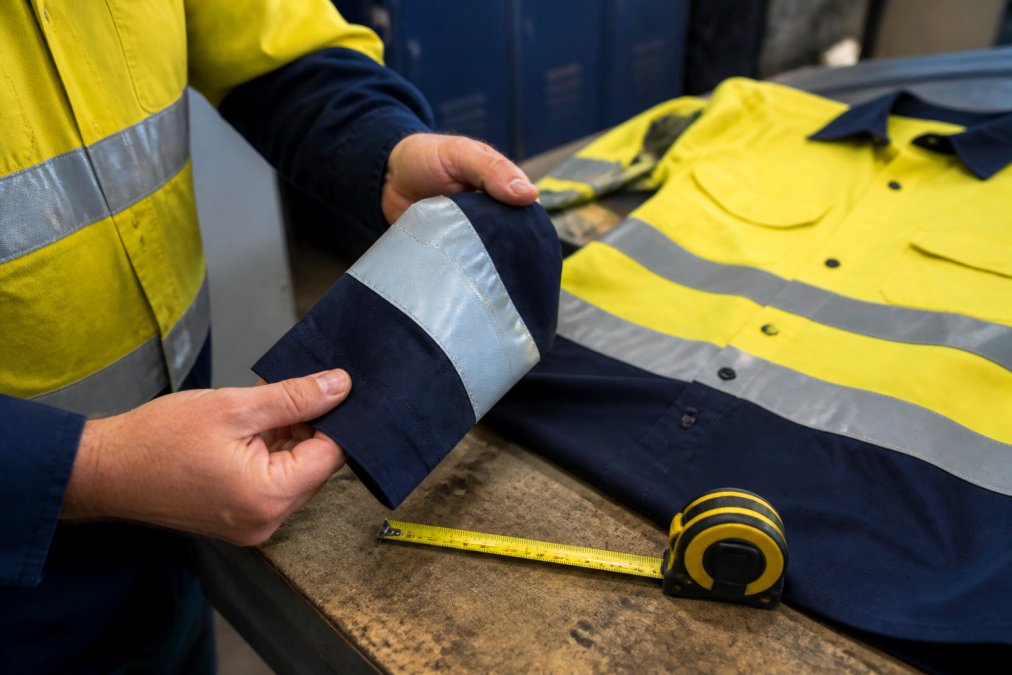
Retro-Reflective vs Standard Reflective Tape
Retro-reflective tape bounces light straight back toward its source, so the wearer appears bright to an approaching driver rather than merely light-coloured. Standard reflective or fluorescent fabric relies on colour and ambient light: it helps in daylight but does almost nothing in a dark yard or on an unlit road. Fluorescent fabric handles the daytime half of the problem; retro-reflective tape handles the night half. A compliant garment needs both.
Tape Width, Placement and Garment Coverage
Width is specified by the relevant standard, and coverage by the garment class. Most work shirts use tape around 50mm wide, the common configuration for the two-tape and three-tape patterns on site. Bands around the torso, over the shoulders and down the arms create the human silhouette a driver recognises at distance.
A quick way to think about the trade-offs:
| Tape type | Best for | Main weakness |
|---|---|---|
| Retro-reflective, sew-on | Industrial laundering, heavy abrasion | Higher unit cost, needs stitching |
| Retro-reflective, iron-on | Low-wash garments, quick repairs | Heat bond can lift over time |
| Standard reflective fabric | Daylight visibility only | No night-time return |
| Fluorescent base fabric | Daytime conspicuity | Fades under UV |
Standard-Specific Selection by Industry
Not every workplace needs the same tape grade, and matching tape to hazard is where most buyers go wrong.
| Industry | Typical hazard | Tape configuration | Key performance need |
|---|---|---|---|
| Road and traffic control | Vehicle strike at speed | Day/night class, 50mm tape, three-band pattern | High retro-reflective intensity at distance |
| Construction | Plant movement, poor lighting | Day/night class, 50mm tape, two or three bands | Abrasion resistance, industrial wash durability |
| Mining | Heavy machinery, dust, remote sites | Day/night class, 50mm tape, maximum coverage | Industrial laundering, dust shedding, UV stability |
| Warehousing and logistics | Forklift traffic, indoor low light | Day/night class, 50mm tape, torso bands | Flex fatigue resistance, frequent washing |
| Rail and track work | High-speed trains, night work | Day/night class, 50mm tape, full silhouette | Retro-reflective intensity, colour fastness |
| Emergency services | Night incidents, varied environments | Day/night class, 50mm tape, high coverage | Wash durability, flame resistance where required |
AS/NZS 4602.1 High Visibility Safety Garments: What the Standard Actually Requires
AS/NZS 4602.1 sets out the design and performance requirements for high visibility safety garments, covering garment design, minimum areas of fluorescent and retro-reflective material, and how those materials must perform. AS/NZS 1906.4 covers the materials themselves, including reflective intensity, colour fastness and durability after washing. A shirt is only compliant if both material and design meet their requirements.
Sew-On vs Iron-On Reflective Tape Durability Compared
Sew-on tape wins on durability in almost every industrial setting. The stitching creates a continuous mechanical bond that survives laundering, abrasion and flexing, with no adhesive to soften with heat or break down with detergent. Iron-on tape is faster to apply and fine for low-wash garments, but its heat-activated adhesive is the weak link.
| Factor | Sew-On | Iron-On |
|---|---|---|
| Bond method | Stitched mechanical bond | Heat-activated adhesive |
| Industrial laundering | Handles repeated cycles | Bond degrades over cycles |
| Abrasion resistance | High, stitching holds edges | Edges lift first |
| Application speed | Slower, needs a machine | Fast, needs an iron |
| Best use | Daily-wear work shirts | Repairs and light-duty garments |
The Chemistry Behind the Bond
The durability difference comes down to adhesive chemistry. Iron-on tape uses a heat-activated adhesive, typically a polyurethane or polyamide hot-melt film, that softens when heated and bonds as it cools. That bond is strong initially but thermoplastic: repeated heat, detergent and flexing gradually break it down, and once it weakens, moisture and detergent penetrate under the tape edge and lift it.
DIY vs Professional Application
Most tape failures are application failures, not material failures. These steps separate a job that lasts from one that peels after a few washes.
Work Shirt HiVis Long Sleeve Reflective →
DIY application: iron-on tape
- Preheat the iron to the temperature recommended by the tape manufacturer. Too hot and the adhesive burns; too cool and it will not activate.
- Place the garment on a firm, heat-safe surface. A padded ironing board can absorb heat and prevent a proper bond.
- Position the tape and cover it with a thin pressing cloth to protect the reflective surface.
- Press firmly for the full dwell time recommended, typically 10 to 20 seconds per section, applying steady pressure rather than moving the iron back and forth.
- Allow the garment to cool completely before moving it. The bond strengthens as it cools.
- Wash inside out on a gentle cycle for the first few washes to let the bond settle.
Professional application: sew-on tape
- Choose a UV-stabilised thread that matches or complements the tape colour. Standard cotton thread will rot under UV exposure.
- Use a lockstitch or chainstitch with a stitch density that secures the tape edges without perforating the reflective layer excessively.
- Stitch along both edges of the tape, not just the centre. Edge stitching is what prevents lifting.
- For high-wear areas, consider a box-X stitch at the ends of the tape to reinforce the most stressed points.
- Test a sample garment through a full wash cycle before committing a whole batch.
When Iron-On Tape Makes Sense
Iron-on tape suits repairs, light-use garments, and situations where you need a taped shirt today and no sewing machine is available. It is also useful for adding visibility accents to a garment that is not itself high-visibility. It is not suited to a daily-wear work shirt that goes through an industrial laundry every week: the adhesive bond is not built for that duty cycle, and the tape will lift at the corners long before the fabric wears out.
How to Clean High Vis Shirts With Reflective Tape Without Ruining It
How you clean high vis shirts with reflective tape determines how long the tape lasts, and most premature failures trace back to laundering rather than wear. The reflective layer is a bonded surface, and heat, harsh chemicals and abrasion all attack it.
- Wash at a moderate temperature, not hot. High heat softens adhesives and stresses the bead layer.
- Skip fabric softener entirely. It leaves a residue that coats the reflective surface and dulls the return.
- Avoid bleach and strong solvents, which degrade both the fluorescent fabric and the tape.
- Turn garments inside out and wash separately from abrasive items like work trousers with metal fittings.
- Tumble dry on low, or line dry out of direct sun. Excessive heat is the enemy of both tape and fluorescent dye.
- Check tape condition after every few washes, not once a year.
Troubleshooting: Why Reflective Tape Peels, Fades and Fails
Most tape failures fall into four categories, each with a specific cause and fix. Diagnosing which one you are dealing with saves you from replacing good garments, or from persisting with tape that has already stopped working.
| Symptom | Likely cause | Fix |
|---|---|---|
| Edges lifting or peeling | Adhesive breakdown from heat or washing | Re-stitch or replace with sew-on tape |
| Tape looks grey or dull | Surface contamination or abrasion | Wash without softener; replace if intensity is gone |
| Cracking along folds | Low-grade bead layer, flex fatigue | Switch to a higher-grade tape |
| Fluorescent fabric faded | UV exposure over time | Replace garment; fading cannot be reversed |
Conclusion
Reflective tape is the cheapest component on a work shirt and the one most likely to decide whether that shirt is still doing its job in six months. Choose retro-reflective tape that meets AS/NZS 1906.4, match the configuration to the garment's class under AS/NZS 4602.1, and specify sew-on tape for anything on a regular wash cycle.
Frequently Asked Questions
What is the difference between sew-on and iron-on reflective tape for work shirts?
Sew-on tape is stitched through the full width of the tape, so it stays put through repeated industrial laundering and abrasion. Iron-on tape uses a heat-activated adhesive that bonds to the fabric surface, which is faster to apply but can lift at the edges after enough wash cycles, especially on cotton-rich drill. For shirts that get washed weekly, sew-on is the more reliable long-term choice.
How do you ensure reflective tape meets Australian safety standards?
Look for garments tested to AS/NZS 4602.1 and tape that complies with AS/NZS 1906.4. The 4602.1 standard covers garment design and how much retro-reflective material is needed for day/night use, while 1906.4 covers the tape itself, including reflective intensity and wash-fastness. Ask your supplier for the test certificate rather than relying on a product photo or a compliance badge on the website.
How often should reflective tape be replaced on high-visibility workwear?
Replace tape when it cracks, peels at the edges, or no longer reflects brightly under a torch in low light. There is no fixed calendar interval, because laundering cycles, abrasion and UV exposure all affect tape life. Many sites inspect hi-vis garments monthly and pull any shirt where the tape has dulled or lifted. Shirts with breathable mesh panels and quality tape often last several seasons before replacement is needed.
Can you apply reflective tape to existing work shirts?
Yes, you can add sew-on or iron-on tape to plain shirts, but the result will not automatically meet AS/NZS 4602.1 unless the tape and the final garment configuration are tested together. For compliance-critical crews, buying shirts that already carry the standard is safer than retrofitting. If you are adding tape for extra visibility on non-regulated tasks, sew-on tape gives the most durable result.
Recent Blogs
September 30, 2026
Durable Reflective Tape for Work Shirts: 2026 Guide
Durable reflective tape for work shirts explained: AS/NZS 4602.1 compliance,...
September 30, 2026
Durable Reflective Tape for Work Shirts: 2026 Guide
Durable reflective tape for work shirts explained: AS/NZS 4602.1 compliance,...
September 30, 2026
Durable Reflective Tape for Work Shirts: 2026 Guide
Durable reflective tape for work shirts explained: AS/NZS 4602.1 compliance,...