
Custom Logo Embroidery for Work Uniforms: A How-To


Table of Contents
- What You'll Need Before Ordering Custom Logo Embroidery
- Logo Embroidery File Requirements and Digitising
- Work Uniform Logo Placement and Sizing Decisions
- High Visibility Workwear Embroidery: Fabric and Garment Selection
- Custom Workwear Embroidery Turnaround Time and Ordering
- Caring for Embroidered Work Uniforms
- Common Mistakes to Avoid When Ordering Custom Logo Embroidery
- Frequently Asked Questions
Last Updated: October 10, 2026
What You'll Need Before Ordering Custom Logo Embroidery
Custom logo embroidery for work uniforms starts with preparation. Before you place an order, gather the essentials: your logo artwork, a clear understanding of your team's sizing needs, and a sense of where you want the embroidery placed on each garment.
Your logo file is the foundation. You'll need a digital version of your company logo (ideally a vector file like .ai or .eps) or a high-resolution image.
Determine your order scope: how many team members need uniforms and what sizes? Having this information ready speeds up the quoting process and helps you avoid costly errors.
Logo Embroidery File Requirements and Digitising
Your logo file determines the quality of your finished embroidery. Most embroidery machines work from stitch files, digital instructions that tell the machine exactly where to place each stitch. If your logo is a standard digital image (like a PNG or JPG), it needs to be converted into a stitch file format.
This conversion process is called digitising. A digitiser recreates your artwork as a series of stitches, deciding stitch count, direction, and how to handle curves and fine details. A well-digitised logo reproduces your brand accurately; a poorly digitised one looks blurry, distorted, or oversimplified.
Vector files (.ai, .eps, .pdf) are ideal because they scale without losing quality. Avoid very small or overly complex designs; fine lines and tiny text don't translate well to embroidery.
Ask upfront whether highly complex artwork incurs a setup fee.
Work Uniform Logo Placement and Sizing Decisions
Logo placement affects visibility, durability, and professional appearance.
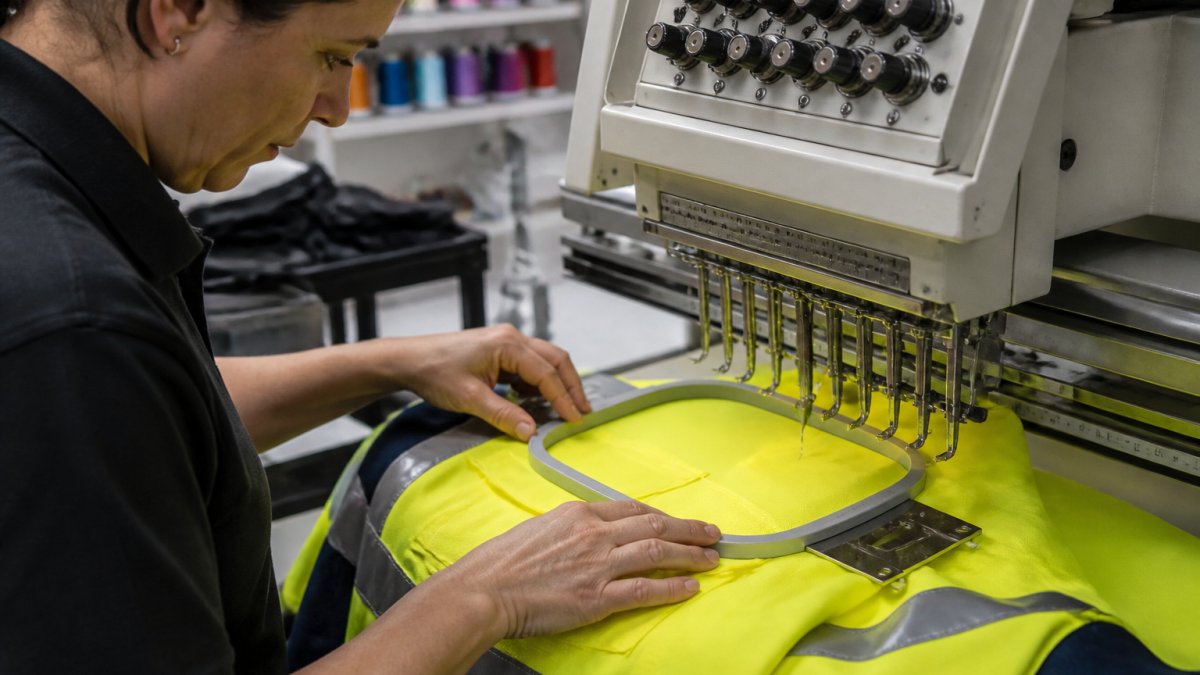
Common placement options include the chest, sleeve, back, or collar. For high-visibility workwear, the chest is standard and visible when your team faces clients. Sleeve embroidery suits smaller logos or secondary brand marks.
Stitch count determines final size and cost. More stitches mean higher costs and longer turnaround.
Keep logos between 2 and 4 inches wide for chest placement. Smaller than 2 inches and fine details disappear; larger than 4 inches and embroidery becomes visually heavy. Practical experience suggests that for optimal visibility and detail retention on workwear, a size range of approximately 75mm to 100mm is generally recommended for chest placement.
Thick, structured fabrics like heavy cotton or canvas hold embroidery better than stretchy or thin materials.
High Visibility Workwear Embroidery: Fabric and Garment Selection
Not all fabrics embroider equally well, and high-visibility workwear presents unique challenges because reflective tape, fluorescent dyes, and safety requirements constrain where logos can sit. Choosing the right base garment prevents poor embroidery quality, rework, and compliance issues.
Fabric Types and Embroidery Performance
Cotton and cotton blends (80/20 or 65/35 cotton-polyester): The embroidery standard. Cotton is stable, holds stitches securely, resists puckering, and produces crisp embroidery that holds its shape through the garment's life.
Polyester and polyester-rich blends: Durable but prone to heat damage from the embroidery needle, which can melt fibres and create discolouration. Stitches can slip during embroidery, resulting in less precise designs. Polyester blends work for high-visibility workwear but are best suited to bold, simple logos rather than fine detail.
Stretchy fabrics (lycra, spandex, elastane blends): Avoid these for embroidery. Stretch fabrics distort stitches and cause puckering. Place embroidery on stable, non-stretch sections only.
Heavy-weight fabrics (canvas, heavy twill, denim): Provide excellent stability and crisp, durable embroidery. Ideal for jackets, work shirts, and caps. Embroidery takes longer, increasing turnaround, but the superior finish justifies the extra time.
Lightweight fabrics (thin cotton, fine poly blends): Embroider quickly and cost less but are prone to puckering and offer less support for larger logos. Use only for small, simple logos.
Garment Weight and Stabiliser Considerations
Embroidery machines use stabiliser, a temporary backing material placed behind the fabric, to prevent puckering and support stitches. Lightweight fabrics require heavier stabiliser.
Your provider will typically use tear-away stabiliser (removed after embroidery) or cut-away stabiliser (left in place). Cut-away is more durable for work uniforms but adds slight stiffness.
High-Visibility Compliance and Placement Constraints
High-visibility workwear is often subject to safety standards set by your workplace or industry. In many cases, reflective tape or piping is positioned on the chest, sleeves, and back to meet visibility requirements. Your embroidery must not interfere with these reflective elements.
Check your workplace safety standards for areas reserved for reflective tape. Common restrictions include the chest (reflective stripe), sleeves (reflective bands), and back (reflective panel). Position logos away from these areas.
If your logo must sit near reflective tape, use contrasting thread colours. Bright or neon thread colours (yellow, white, or lime green) stand out and remain visible on site.
Garment Style Suitability
Different garment styles present different embroidery challenges:
Polos and work shirts: Ideal for embroidery. Ensure the garment has enough fabric weight to support your logo size without puckering.
Jackets and outerwear: Heavy-weight fabrics embroider beautifully, but seams and quilting can interfere with needle placement. Position logos on flat panels, away from seams.
Caps and beanies: Curved surfaces make cap embroidery challenging. Logos must be small (under 2 inches) and simple. Expect higher per-unit costs and longer turnaround.
Trousers and shorts: Embroidery on trouser legs is uncommon because fabric movement stresses stitches. Place logos on flat areas like the thigh or back pocket, and use simple designs.
High-visibility vests: Typically made from lightweight, reflective-coated polyester. Embroidery on reflective material is difficult because the coating can melt under needle heat. Discuss options with your provider before ordering.
Custom Workwear Embroidery Turnaround Time and Ordering
Ordering custom logo embroidery for work uniforms involves several distinct steps. Understanding this process helps you budget accurately and avoid surprises.
Step 1: Artwork Submission and Review
Submit your logo file and placement preferences. Your embroidery provider will review the artwork for suitability. Vector files (.ai, .eps, .pdf) take 1-2 business days.
Step 2: Quote and Mockup Approval
You'll receive a detailed quote breaking down costs: garment cost per unit, setup fee, and per-location embroidery cost.
Most providers supply a digital mockup showing your logo on the garment colour and placement. Review carefully to adjust sizing, placement, or thread colour before production begins.
Step 3: Sample Approval (Optional but Recommended)
Step 4: Production and Delivery
Once you approve the sample or mockup, production begins. Turnaround depends on order size: small orders (1-20 units) take 5-10 business days; medium orders (21-50 units) take 10-15 business days; large orders (50+ units) take 15-25 business days. Stitch count also affects speed.
Factors That Extend or Compress Timelines
Seasonal demand: Orders placed during peak seasons may take longer. Plan ahead.
Digitising complexity: Photorealistic logos or designs with many colours require more time. Simple, bold logos digitise fastest.
Rush options: Rush orders are usually limited to smaller quantities and may not be available during peak periods.
Garment availability: If your chosen garment is out of stock, the provider must reorder, adding 1-2 weeks. Confirm availability when requesting your quote.
Cost Breakdown Example
Caring for Embroidered Work Uniforms
Embroidered uniforms last longer when cared for properly. Improper washing, drying, or storage degrades both the garment and the embroidery.
Wash embroidered work uniforms inside out in cool water. This protects the stitching from abrasion and fading. Use mild detergent and avoid bleach, which weakens thread and can discolour logos. Wash with similar colours to prevent dye transfer.
Dry on a low heat setting or air dry when possible. High heat can shrink garments and weaken embroidery thread. If you use a dryer, remove uniforms promptly to avoid creasing that stresses the stitches.
Iron carefully, if at all. If pressing is necessary, iron the garment inside out and avoid the embroidered area. Direct heat on embroidery can melt synthetic threads and damage the design. Many work uniforms don't require ironing; wrinkles are expected in field environments.
Store uniforms in a cool, dry place away from direct sunlight. Prolonged sun exposure fades embroidery thread and weakens fabric. Ensure uniforms are fully dry before storage to prevent mildew.
Check embroidery regularly for loose threads or damage. Catching problems early prevents small issues from becoming unusable uniforms.
Common Mistakes to Avoid When Ordering Custom Logo Embroidery
The most frequent error is submitting low-quality artwork. Blurry, pixelated, or hand-drawn logos don't digitise well. Always provide the best-quality version of your logo available. If you're unsure, ask your graphic designer for the original file.
Underestimating sizing is another common trap. A logo that looks good on a computer screen can appear tiny on a work shirt. Discuss sizing with your embroidery provider before finalising your design. They'll show you mockups or samples so you can see the actual size on fabric.
Ignoring garment compatibility causes problems. Selecting a cheap, thin base garment to save money often results in poor embroidery quality and uniforms that don't last. Invest in quality garments from the start; they're worth it.
Rushing the approval process leads to mistakes. Take time to review proofs and mockups carefully. Check logo placement, colour accuracy, and sizing. Once production starts, changes become expensive or impossible.
Forgetting to account for minimum order quantities creates budget surprises. Hi Vis Work Clothes works with orders of any size, but clarifying this upfront prevents disappointment.
Ordering custom logo embroidery for work uniforms doesn't have to be complicated. With the right preparation, quality artwork, clear sizing decisions, and proper garment selection, your team will have professional, durable uniforms that represent your brand on site.
At Hi Vis Work Clothes, we manage every step of the custom logo embroidery process, from digitising your artwork to final quality control. Our team handles orders of all sizes and works with you to meet your timeline and budget. Get a quote today and see how we can bring your brand to life on your team's workwear.
Frequently Asked Questions
What file format do I need for custom logo embroidery?
Your logo should be provided as a high-resolution vector file (AI, EPS, or PDF preferred) or a clear raster image at least 300 DPI. The digitising process converts your artwork into a stitch file that the embroidery machine reads. Avoid low-resolution JPEGs or logos with fine gradients, as these don't translate well to stitches. Your embroidery provider can advise on file requirements.
How long does custom workwear embroidery take?
Turnaround time depends on order size, design complexity, and current workload. Small orders may take 5-10 business days, while bulk orders typically require 2-4 weeks. Rush options are sometimes available at additional cost. Always confirm the timeline with your supplier before placing an order, especially if you have a specific start date for new team members or a seasonal deadline.
Can you embroider logos on high-visibility workwear?
Yes. High-visibility workwear embroidery is suitable and durable, provided the garment fabric is stable enough to support stitching. Reflective tape areas should be avoided because needle holes compromise the reflective coating. Work with your supplier to position logos on solid fabric panels; chest, sleeves, or back areas work well. Embroidery on high-visibility gear is more durable than printing and resists fading and peeling through repeated washing.
How should I care for embroidered work uniforms?
Wash embroidered garments in cold water, inside out, on a gentle cycle to protect the stitching. Avoid bleach and fabric softener, which weaken thread. Dry on low heat or air-dry to prevent shrinkage and thread damage. Do not iron directly over the embroidery; iron the reverse side or use a pressing cloth. Proper care extends the life of embroidery and maintains the professional appearance of your team's branded uniforms.
Recent Blogs
October 11, 2026
Custom Logo Embroidery for Work Uniforms: A How-To
Custom logo embroidery for work uniforms builds team identity and...
October 11, 2026
Custom Logo Embroidery for Work Uniforms: A How-To
Custom logo embroidery for work uniforms builds team identity and...
October 11, 2026
Custom Logo Embroidery for Work Uniforms: A How-To
Custom logo embroidery for work uniforms builds team identity and...